Setup MCP
Integrate AI Diagram Maker with Cursor, Claude Desktop, Claude Code, or any MCP-compatible client.
Get your API key
Create an API key from your AI Diagram Maker account. We have a full guide with screenshots in the User Guide.
- Go to Settings (gear icon on the left navbar or from the user dropdown).
- Open Integrations → API Keys.
- Click Create API key, give it a name (e.g. "MCP Server"), and click Create.
- Copy the key immediately — it will not be shown again. Store it securely.
See our guide for how to create an API key (with screenshots).
Installation
Choose one option below. For Option A, no local setup is needed. For Option B, you need Node.js 18+.
Option A — remote server (recommended)
Use our hosted MCP server — nothing to install. Add the config below to your MCP client (see step 3).
{
  "mcpServers": {
    "ai-diagram-maker": {
      "url": "https://mcp.aidiagrammaker.com/mcp",
      "headers": {
        "X-ADM-API-Key": "<your api key>"
      }
    }
  }
}
Replace <your api key> with your API key from step 1.
Option B — run directly with npx
Run the MCP server locally. Nothing to install permanently — npx runs it on demand.
The command below is a standalone example to test the server works with any MCP-compatible client:
ADM_API_KEY=your_api_key npx ai-diagram-maker-mcp@latestMCP client configuration
Add the AI Diagram Maker MCP server to your client. Replace <your api key> with the API key you created in step 1.
Cursor
Add to your Cursor MCP settings (~/.cursor/mcp.json or via Settings → MCP):
{
  "mcpServers": {
    "ai-diagram-maker": {
      "url": "https://mcp.aidiagrammaker.com/mcp",
      "headers": {
        "X-ADM-API-Key": "<your api key>"
      }
    }
  }
}
Using Option B (npx)? Use this config instead:
{
  "mcpServers": {
    "ai-diagram-maker": {
      "command": "npx",
      "args": ["-y", "ai-diagram-maker-mcp@latest"],
      "env": {
        "ADM_API_KEY": "your_api_key_here"
      }
    }
  }
}
For Option B, to enable debug logging, add "ADM_DEBUG": "1" to the env object. View output in Cursor → Output panel → MCP or ai-diagram-maker channel.
We provide an example setup in Cursor AI tools. Follow these steps:
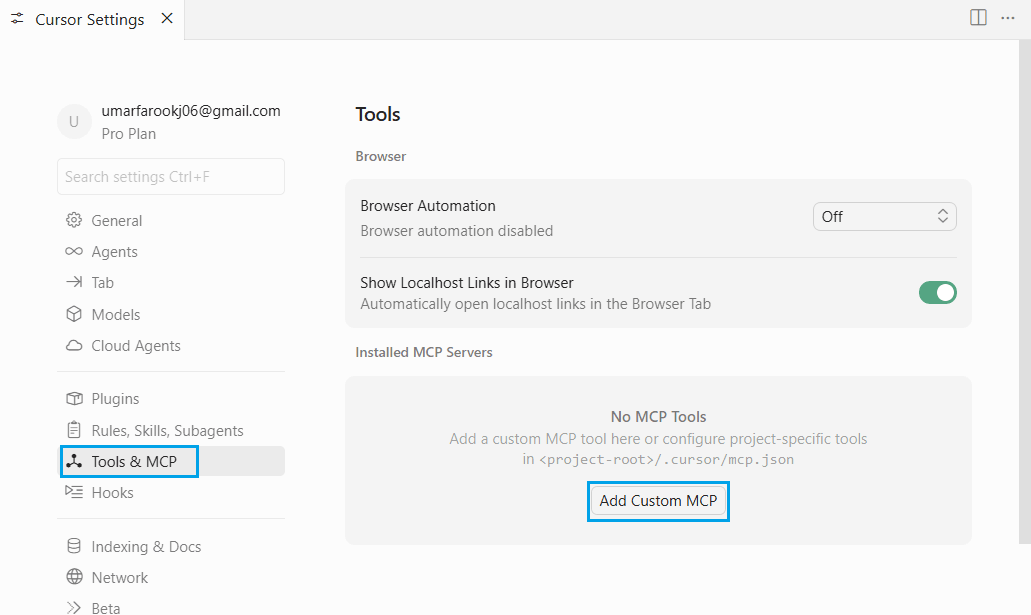
Step 1
Go to Cursor settings, find Tools and MCP and click Add Custom MCP.
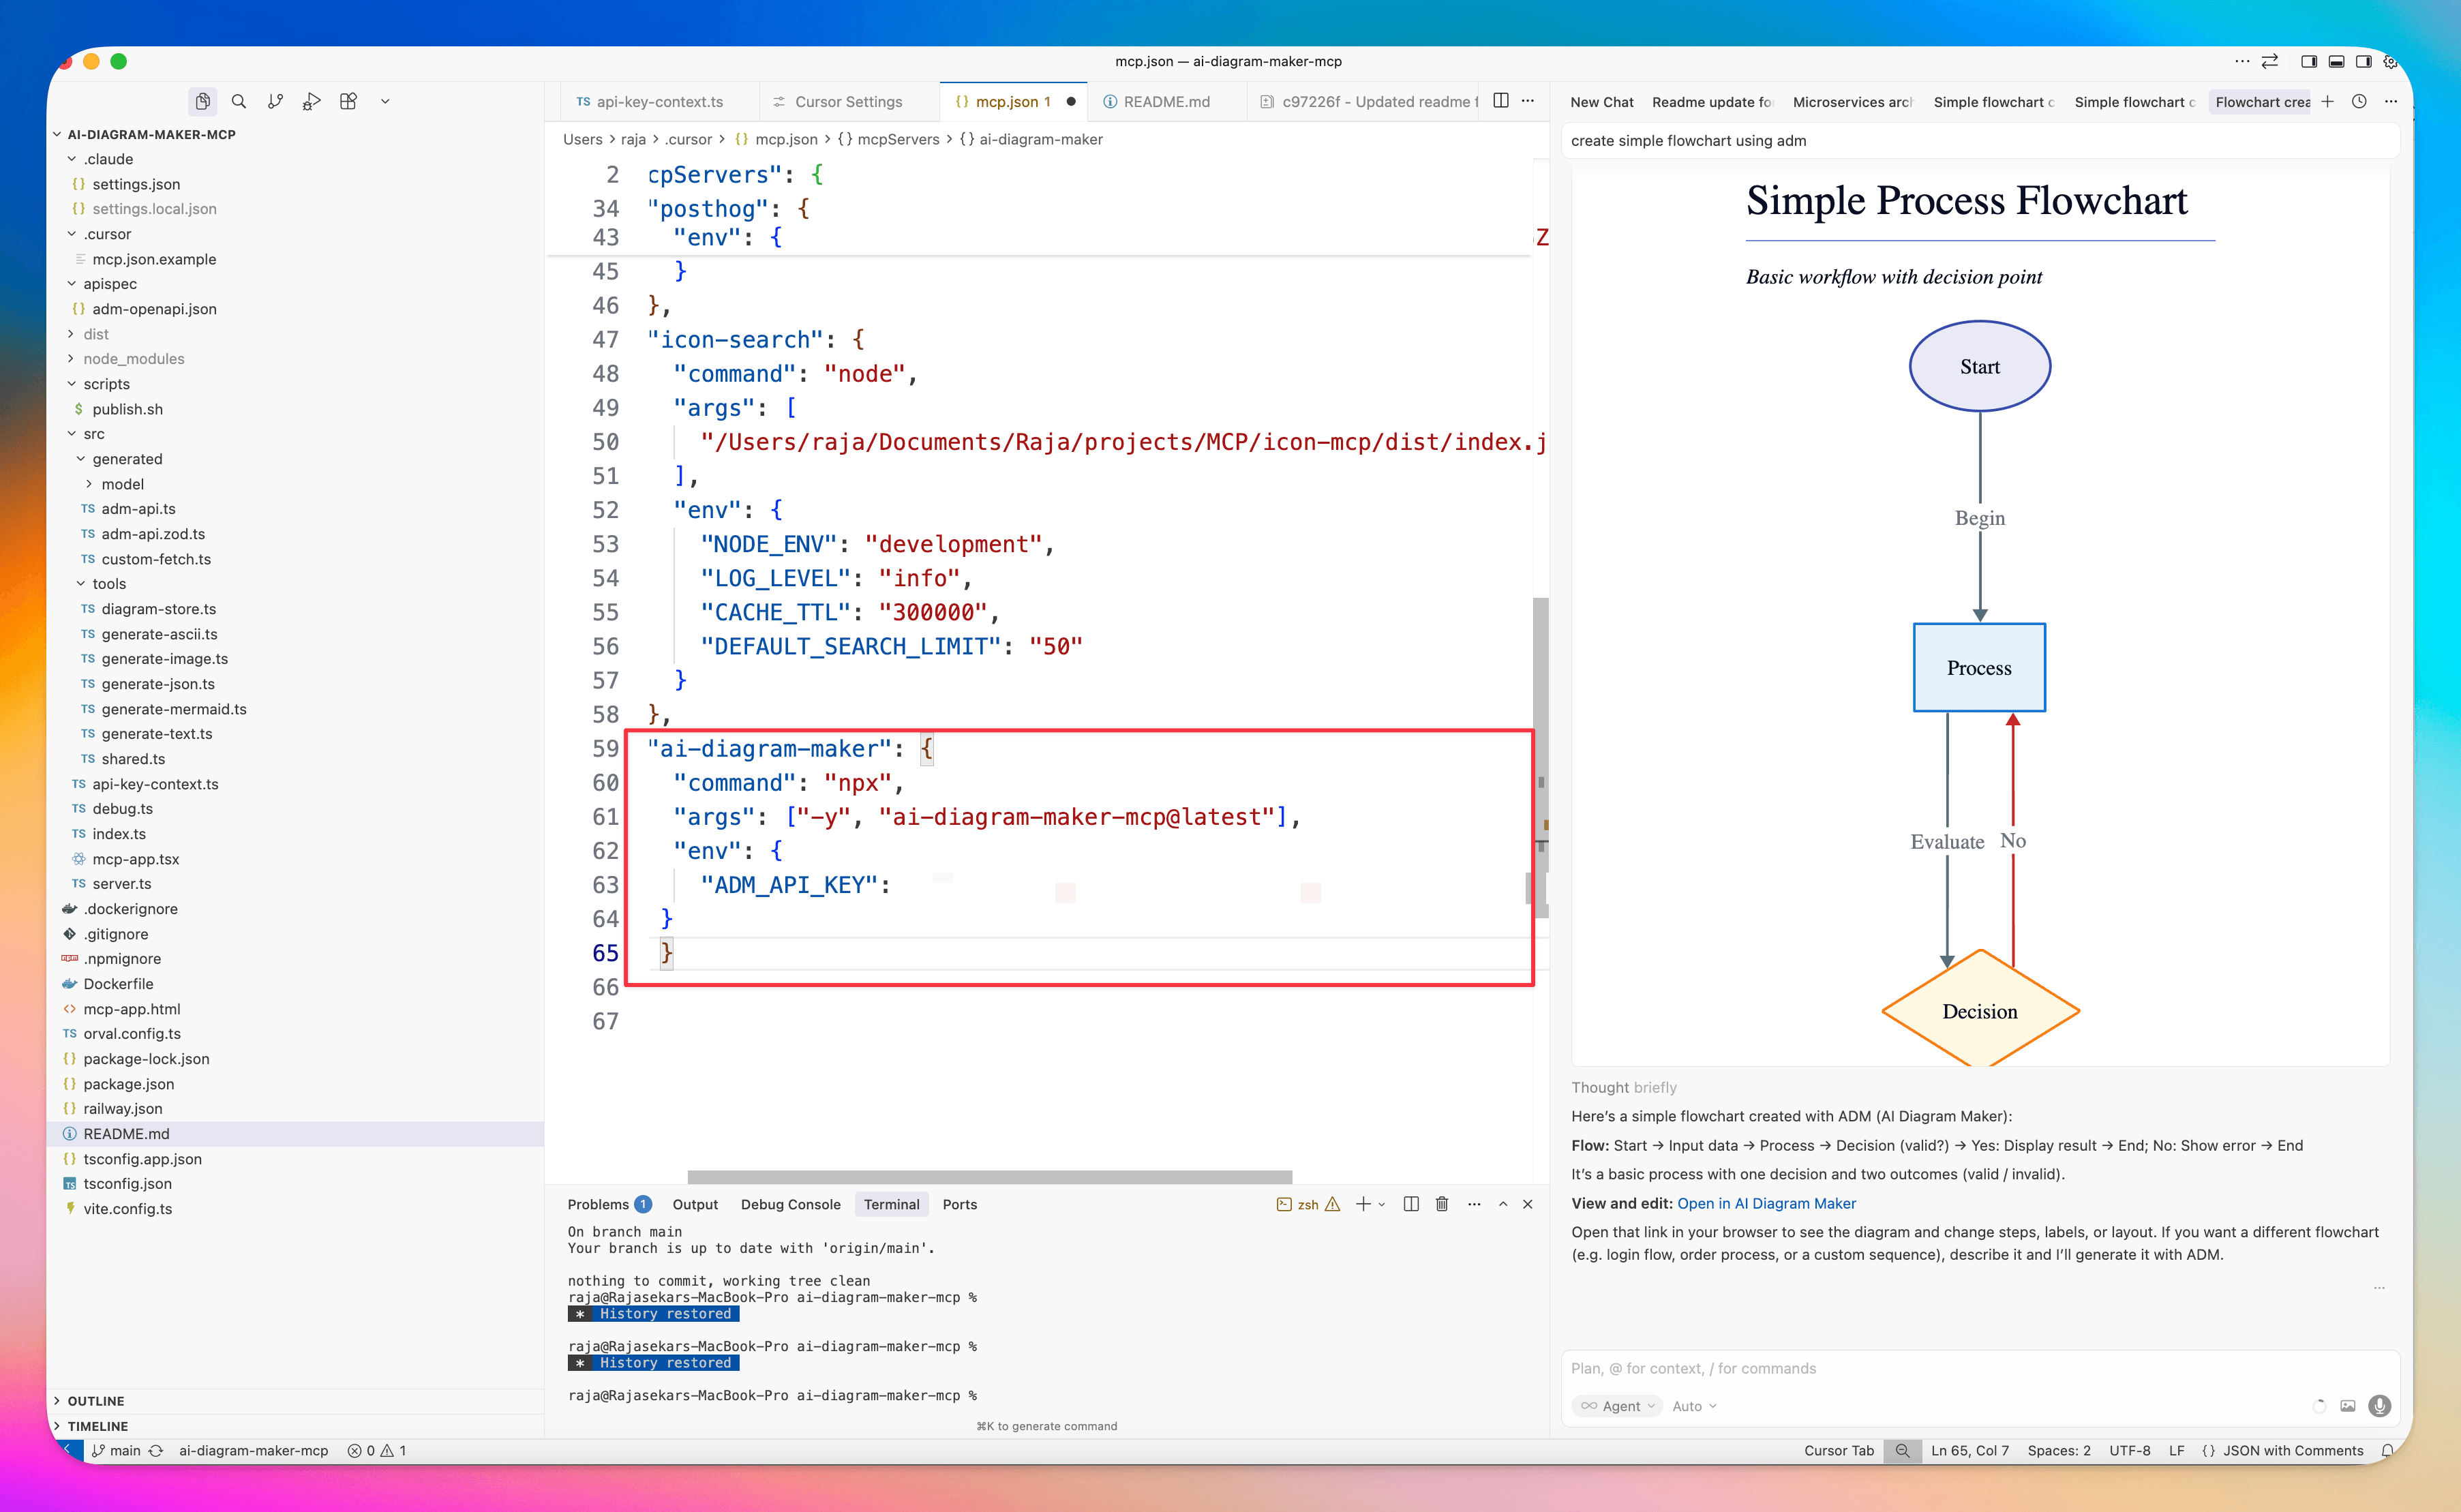
Step 2
Copy and paste the JSON above into mcp.json and replace <your api key> with your API key (created in our app). Then save the file.
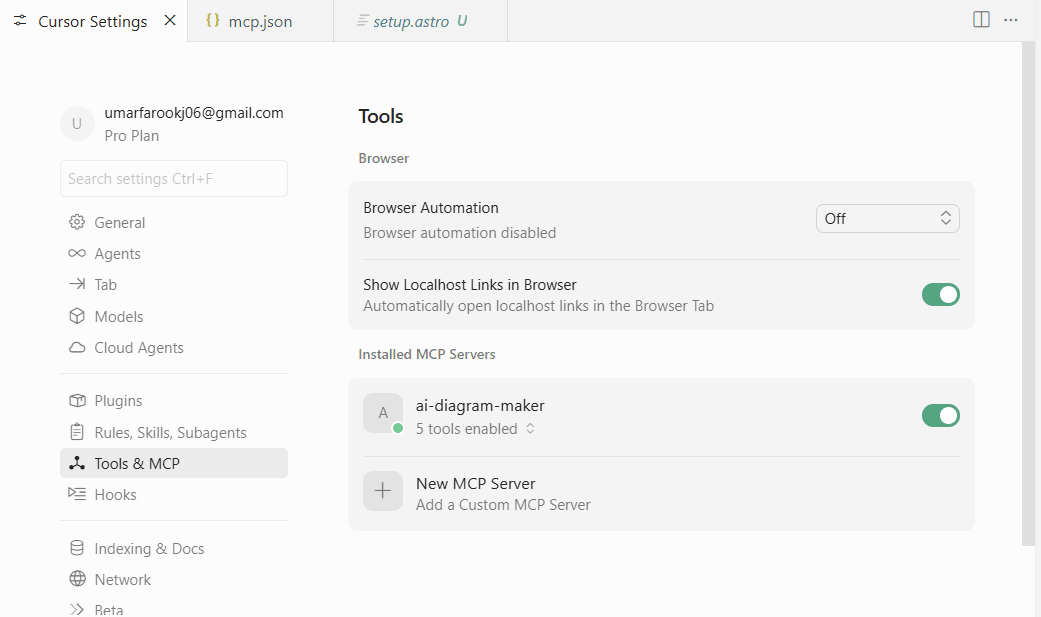
Step 3
After successful setup, you'll see the list of installed servers — the AI Diagram Maker MCP will appear there.
Claude Desktop
Add to ~/Library/Application Support/Claude/claude_desktop_config.json (macOS) or %APPDATA%\Claude\claude_desktop_config.json (Windows):
{
  "mcpServers": {
    "ai-diagram-maker": {
      "url": "https://mcp.aidiagrammaker.com/mcp",
      "headers": {
        "X-ADM-API-Key": "<your api key>"
      }
    }
  }
}
Claude Code
For details, see the Claude Code MCP documentation.
macOS
claude mcp add ai-diagram-maker -t stdio -e ADM_API_KEY=<api_key> -- npx -y ai-diagram-maker-mcp@latestWindows
claude mcp add ai-diagram-maker \
  --command "npx" \
  --args "-y,ai-diagram-maker-mcp@latest" \
--env ADM_API_KEY=your_api_key_hereCreate a diagram with a prompt
Restart your MCP client (e.g. Cursor) after saving the config. Then in the chat, use a natural language prompt. The AI will use the MCP tools to generate a diagram and return a link (and optionally an inline PNG).
Example prompts you can try:
- "Create a microservices architecture with API gateway, auth service, user service, and PostgreSQL database"
- "Draw a sequence diagram for user login flow with JWT token generation"
- "adm show the CI/CD pipeline for a Next.js app deployed to Vercel"
Type your prompt in the chat and click Send. The diagram will be generated and you will get a URL to open it in AI Diagram Maker.
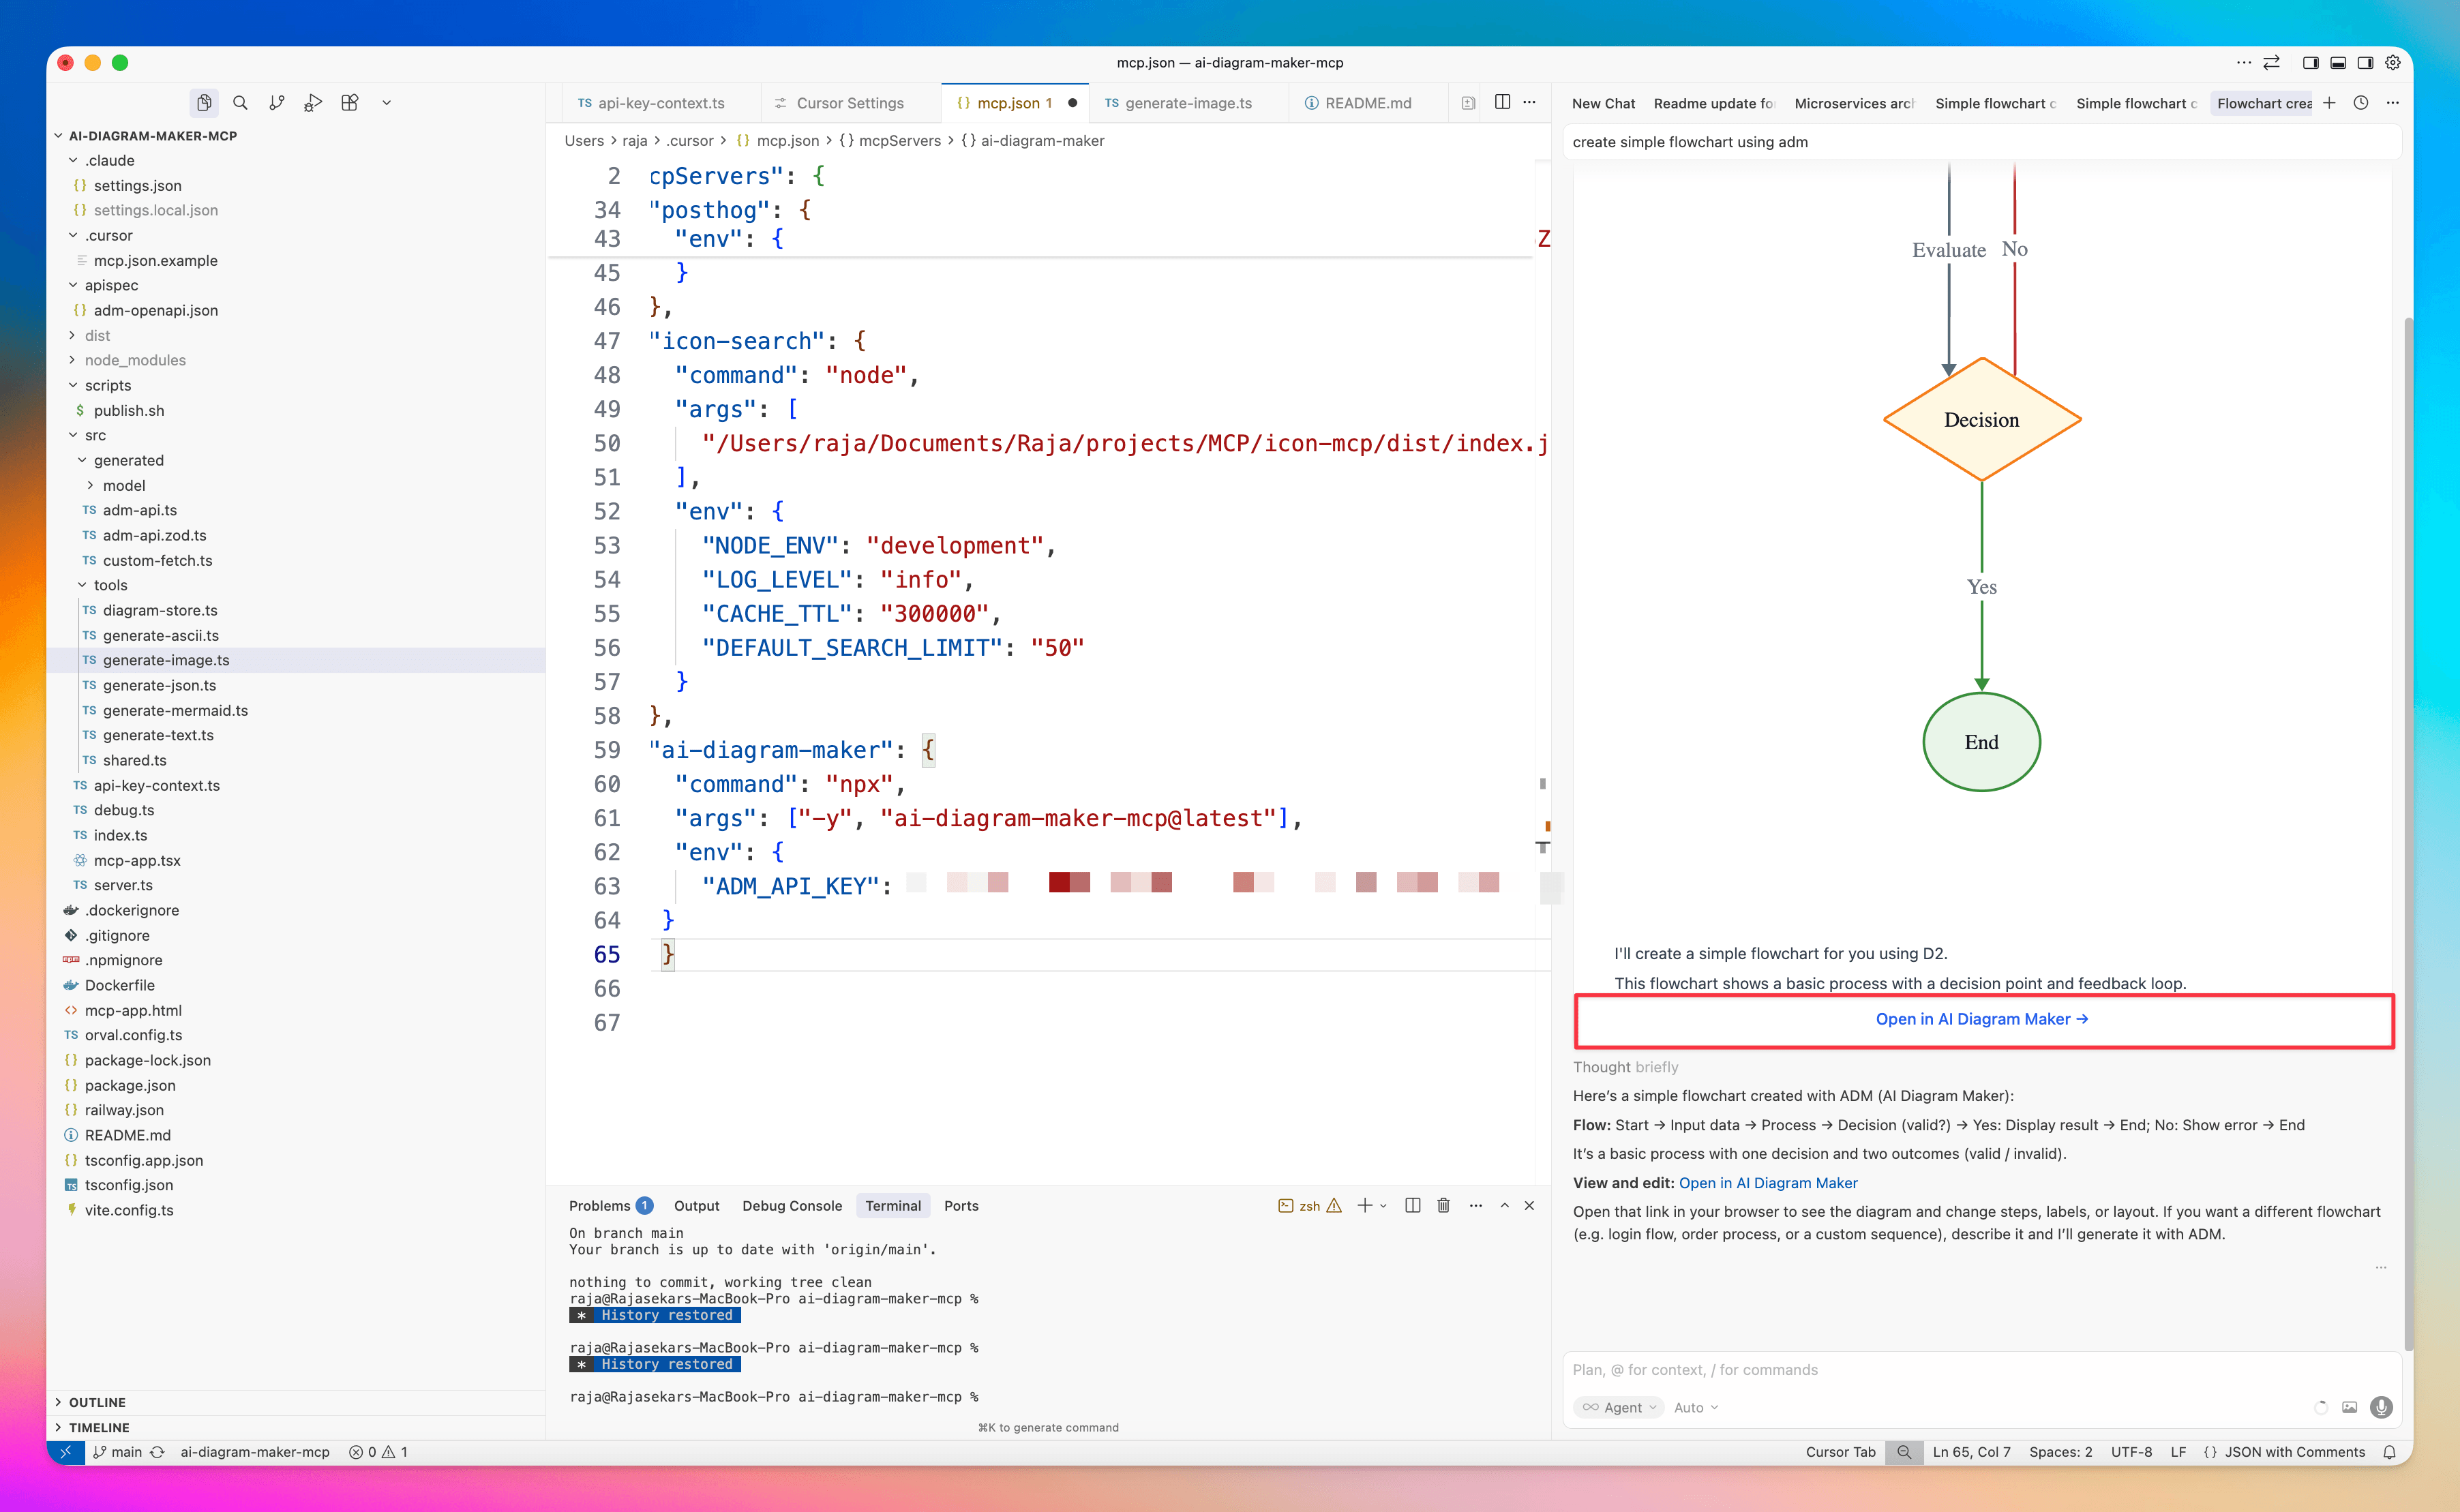
Step 1 — Enter your prompt
Enter your prompt in the chat window of Cursor (or the AI you're using) and click Send.
Step 2 — Diagram and link
The diagram is created visually using the MCP and a link is generated that you can open for customization.
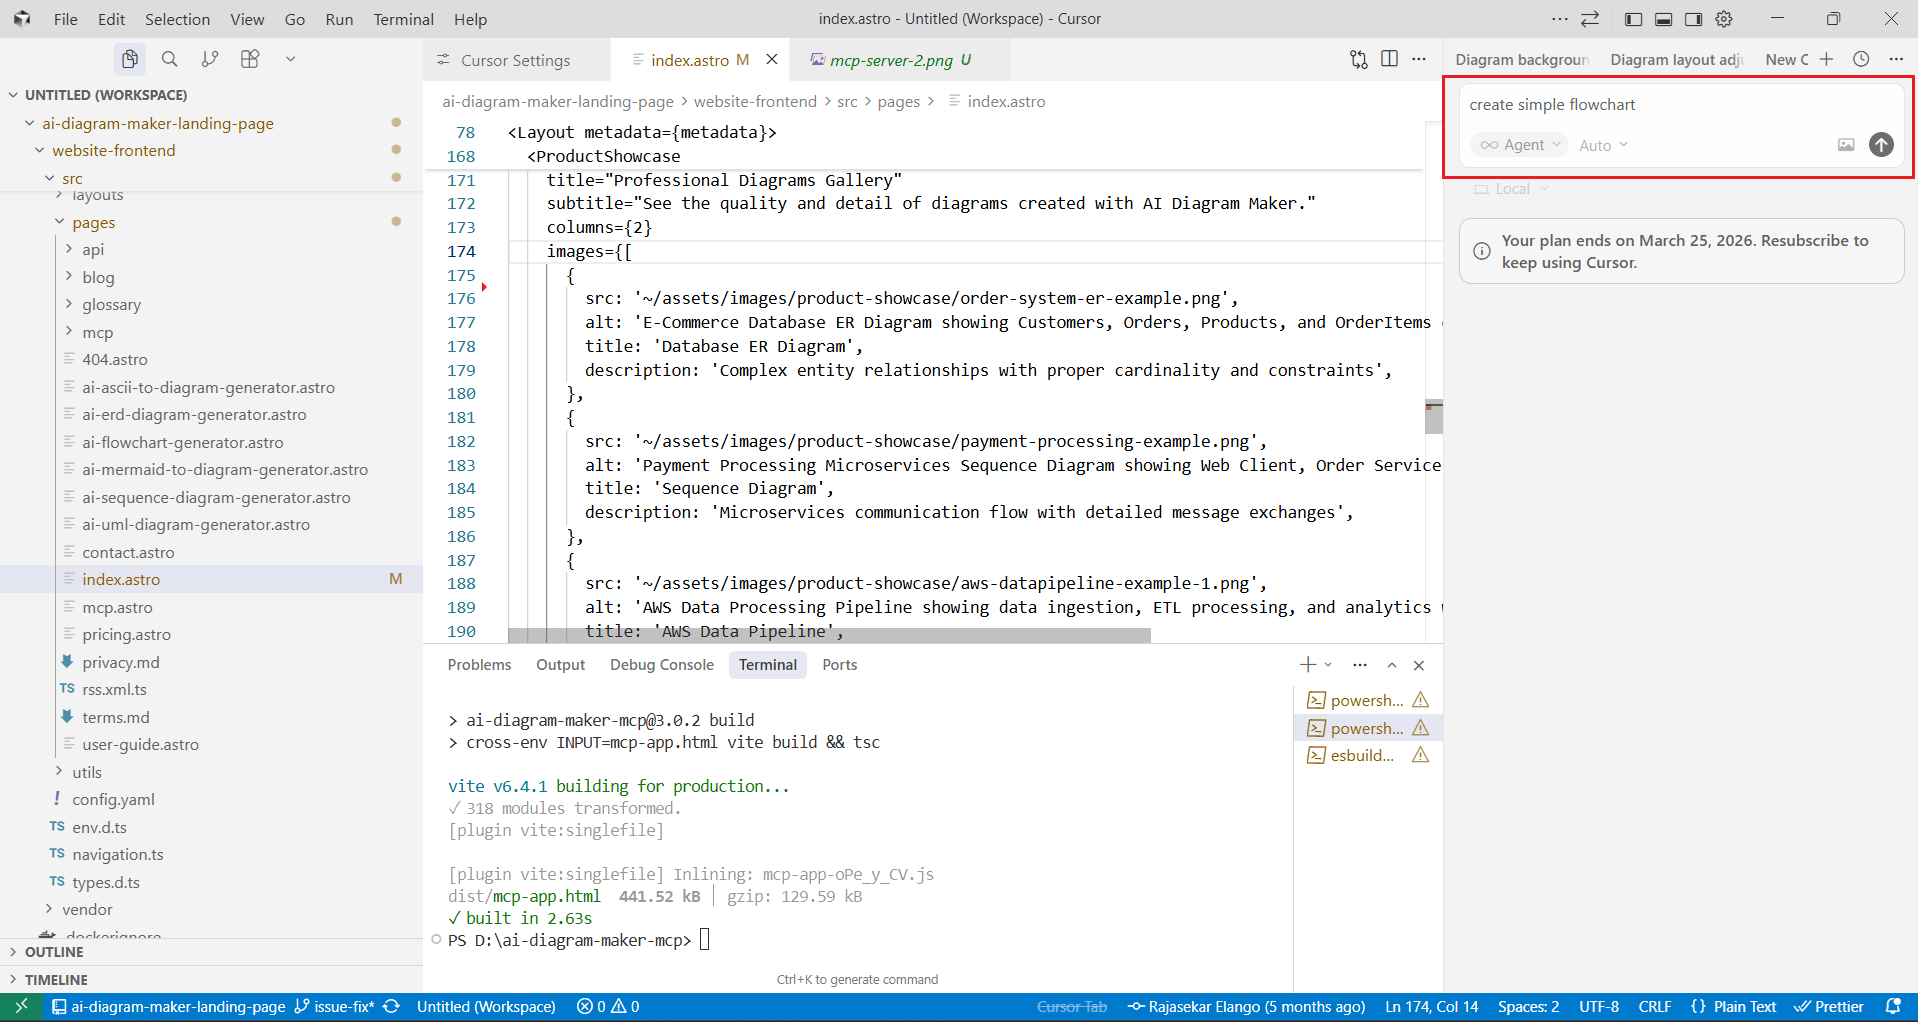
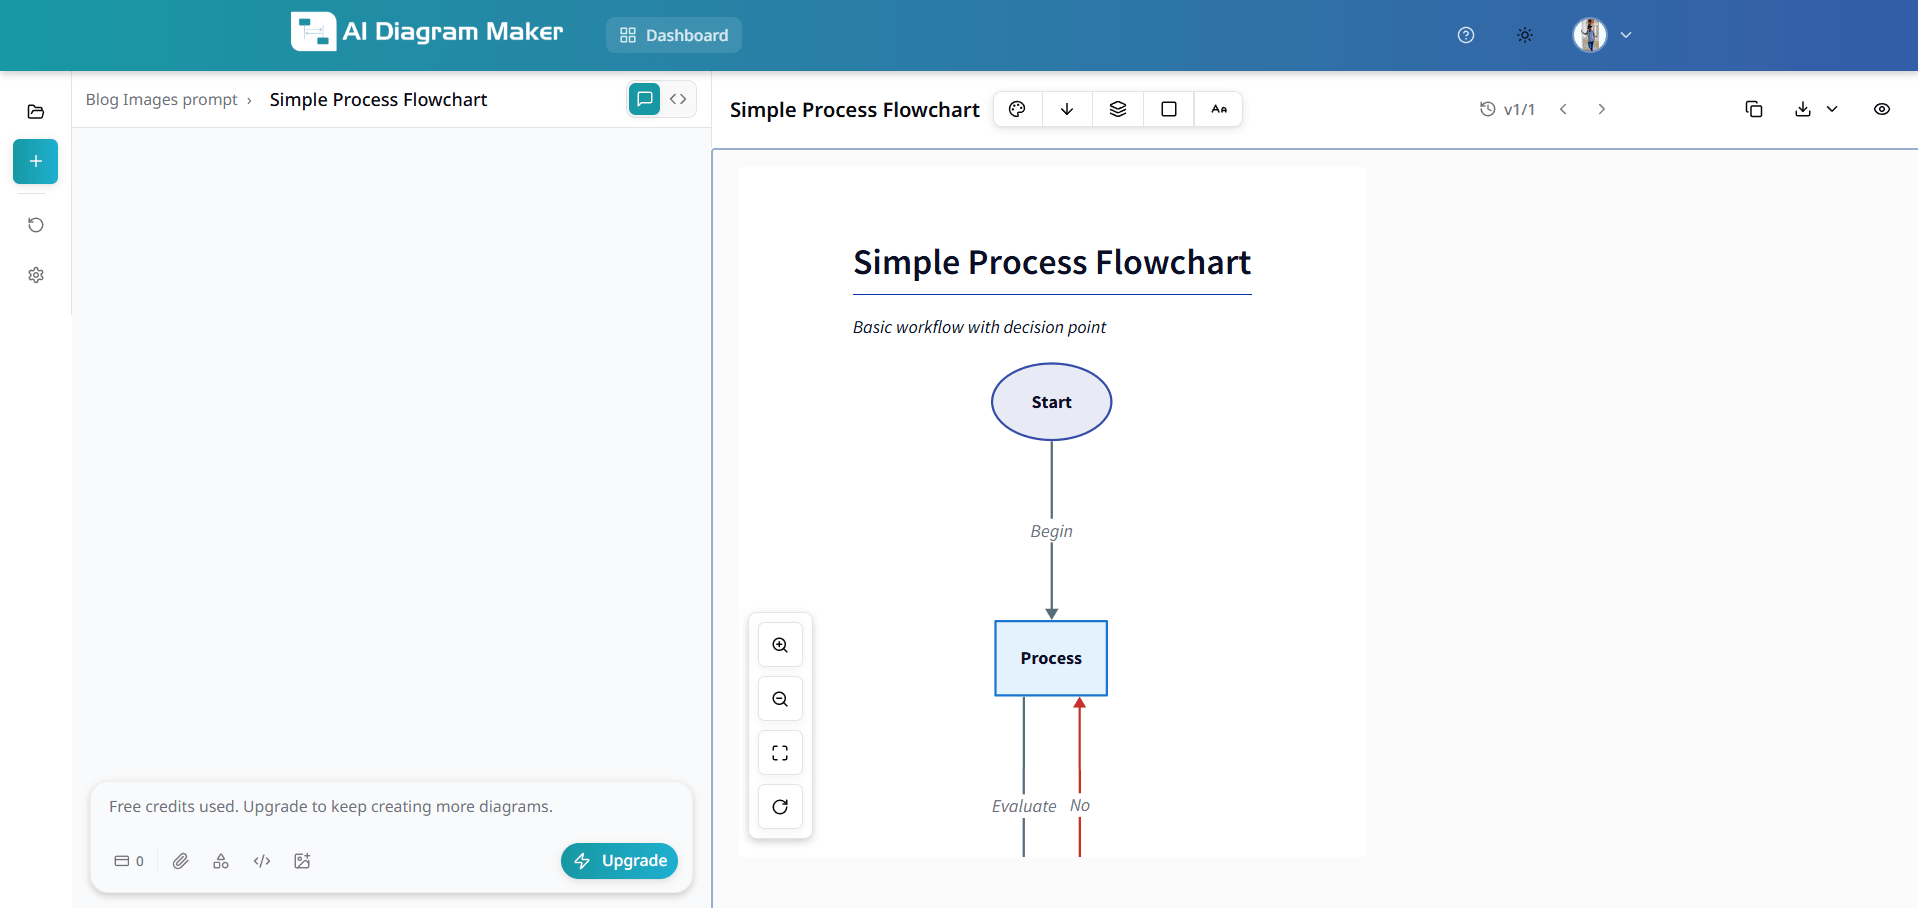
Step 3 — Edit the diagram
You can now edit the diagram that was generated using the MCP tool (e.g. change labels, layout, or add nodes).
Trigger keywords
The AI will often pick the right tool when you use phrases like:
adm ...ai diagram maker ...create a diagram of ...show me a flowchart / sequence diagram / ERD / architecture ...visualise / draw / diagram ...